Introduction: How to Use NotebookLM Tutorial for Smarter Workflows
If you’re looking for a practical how to use NotebookLM tutorial, this beginner-friendly guide will help you understand everything in simple steps. Whether you are a student managing research notes, a blogger organizing content ideas, or a job seeker preparing documents, NotebookLM can simplify your workflow.
In this complete how to use NotebookLM tutorial, you will learn:
- How to set up NotebookLM
- How to upload and organize documents
- How to generate summaries and insights
- Real use cases for students and creators
- Latest NotebookLM features (2026 update)
By the end of this guide, you will know exactly how to use NotebookLM effectively in your daily work.
Learn the basics before diving deeper into NotebookLM. Check out our beginner’s post:
👉 What Is AI & ChatGPT? A Beginner’s Guide to AI Tools
What Is NotebookLM?
Before diving into this how to use NotebookLM tutorial, let’s take a quick look at what NotebookLM actually is.
NotebookLM (originally called Project Tailwind) is an AI-powered note-taking and research assistant created by Google. What makes it unique is that it uses your own documents—not random web data—to provide smart answers, summaries, and content suggestions.
It’s designed to work with PDFs, Google Docs, .docx files, and more. And unlike other AI tools, NotebookLM reads your files and helps you understand them, brainstorm ideas, and stay organized.
🚀 Quick Start: What Can NotebookLM Do for You?
📱 Mobile Users: Swipe left or right to view the full table.
| Use Case | How NotebookLM Helps | Best For |
|---|---|---|
| Study Notes | Creates summaries, study guides and revision notes from PDFs and class materials. | Students |
| Research | Answers questions directly from uploaded documents and research papers. | Researchers & Professionals |
| Blog Writing | Turns research material into outlines, FAQs and content ideas. | Bloggers & Content Creators |
| Interview Preparation | Summarizes company documents, job descriptions and interview resources. | Job Seekers |
| Project Planning | Organizes large amounts of information into actionable insights. | Teams & Freelancers |
📘 Prefer learning NotebookLM in Hindi?
If you are more comfortable reading in Hindi, you can also check our complete NotebookLM Hindi tutorial with step-by-step explanations.
👉 Read NotebookLM Hindi TutorialTop Features You’ll Use Daily
If you’re wondering why you should follow this how to use NotebookLM tutorial, here are the top reasons:
🔑 Key Features:
- Smart Q&A: Ask questions based on your uploaded files.
- AI Summaries: Get quick highlights from long documents.
- Mind Maps: Visualize concepts and workflows.
- Audio Summaries: Listen to your notes as podcasts.
- RAG Technology: Uses Retrieval-Augmented Generation for accuracy.
These features make NotebookLM perfect for:
- Academic research
- Content creation
- Interview preparation
- Project planning
- Legal or professional document analysis
What’s New in NotebookLM (2026 Update)
NotebookLM has improved significantly with new Artificial Intelligence capabilities. Some important improvements include:
🆕 Better AI summaries – More structured and accurate document summaries
🆕 Improved citation links – Responses now show exact source references
🆕 Faster document processing – Large PDFs analyze faster
🆕 Better research assistance – Helps connect ideas across multiple documents
🆕 Improved interface – Cleaner workflow management
How to Use NotebookLM Tutorial: Step-by-Step Guide
Let’s now break down the complete how to use NotebookLM tutorial so you can start using this tool like a pro.
Step 1: Log In and Create a Notebook
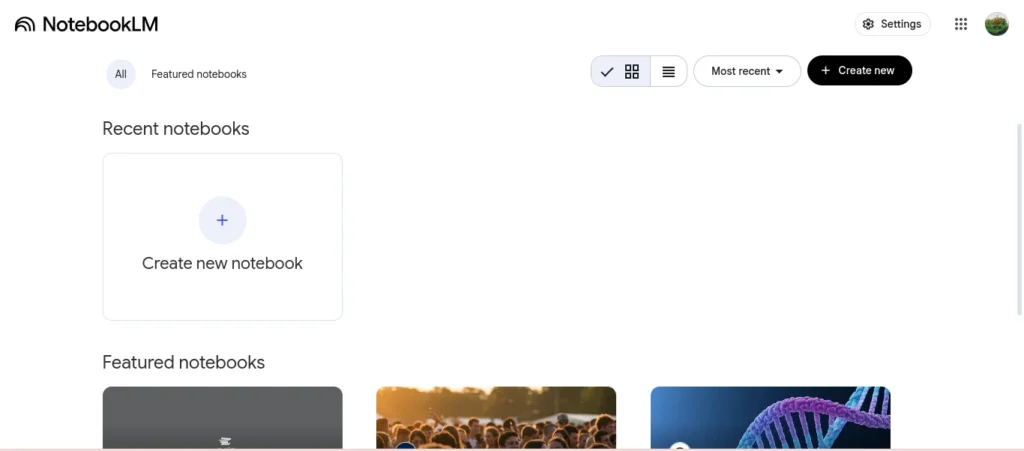
- Visit notebooklm.google.
- Sign in with your Google account.
- Click “New Notebook” to begin.
- Name your notebook based on your project or subject (e.g., “Startup Pitch Notes” or “History Exam Prep”).
You now have your workspace set up. This is where everything happens.
Step 2: Upload Your Source Files
NotebookLM works only with the documents you upload—it does not search the internet.
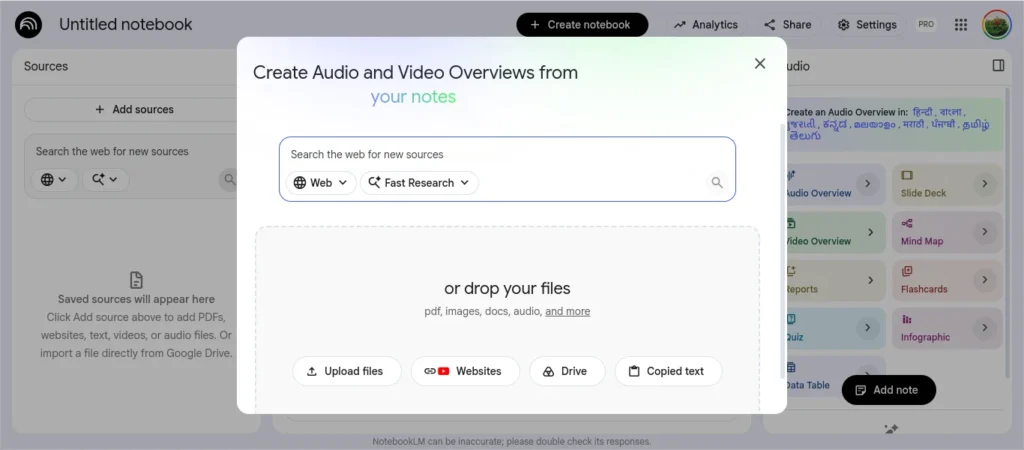
Upload options:
- Sync manually from Google Drive
- Upload files like .pdf, .docx, .txt
- Paste content directly into the notebook
📌 Pro Tip: Keep similar content grouped in one notebook for focused results.
Step 3: Start Asking Smart Questions
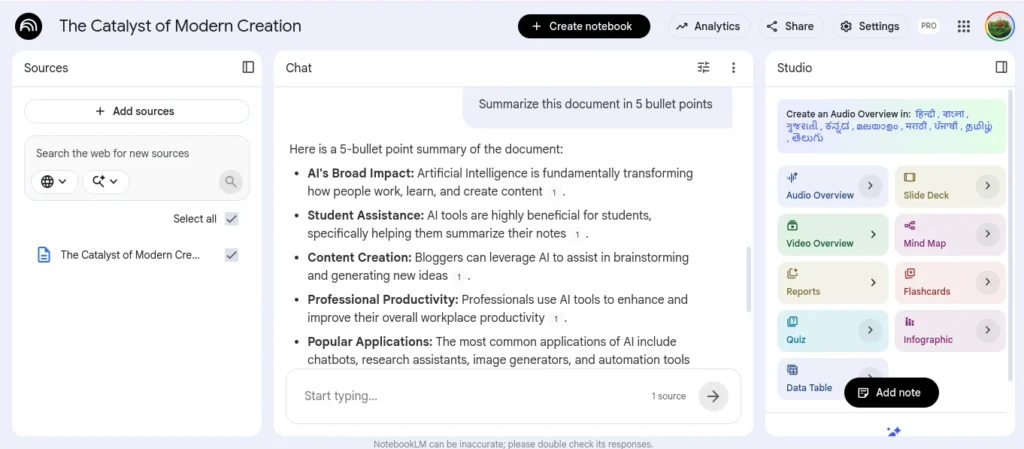
Once your content is loaded, use the chat bar to interact with your documents.
Examples:
- “Summarize the key takeaways from this blog post.”
- “What are the main arguments in this research paper?”
- “Compare the marketing strategies in Document A and B.”
NotebookLM uses RAG-backed responses, meaning it retrieves factual info only from your documents—not the web.
That’s why this how to use NotebookLM tutorial is especially useful if you’re working on custom, original material.
Step 4: Generate Content Ideas & Summaries
This part of the how to use NotebookLM tutorial is a favorite for creators and professionals.
Use NotebookLM to:
- Draft outlines for blog posts or reports
- Turn research into bullet-point notes
- Build FAQs based on uploaded guides
- Summarize business proposals or presentations
- Create a study guide from academic material
You can access previously synced content more conveniently across devices, depending on your setup.
Step 5: Export & Use the Output
Once you get your responses or summaries:
- Copy them into Google Docs, Notion, or your favorite tool
- Edit and refine the content for your use
- Keep everything saved in your NotebookLM notebook for future reference
Explore our detailed comparison of Notion and Anytype to discover which platform offers better privacy, collaboration, offline access, and long-term productivity.
👉 Notion vs Anytype (2026): Which App Is Better for Privacy, Notes & Productivity?
Best Tips to Use NotebookLM Effectively
If you want better results from this how to use NotebookLM tutorial, follow these practical tips:
📌 Use focused notebooks
Do not upload unrelated files together. Keep one topic per notebook.
📌 Ask specific questions
Instead of asking:
“Summarize this”
Ask:
“Summarize the main marketing strategy discussed in this document”
📌 Upload clean documents
Remove unnecessary pages for better responses.
📌 Use it for idea generation
NotebookLM works great for:
- Blog outlines
- Study notes
- Research breakdowns
- FAQ generation
📌 Verify important outputs
Always review AI output before final use.
NotebookLM vs Traditional Note-Taking Apps (Quick Comparison)
| Feature | NotebookLM | Traditional Notes Apps |
|---|---|---|
| AI Summaries | ✔ Yes | ✖ No |
| Document Q&A | ✔ Yes | ✖ No |
| Research Assistance | ✔ Yes | Limited |
| Manual Notes | ✔ Yes | ✔ Yes |
| Idea Generation | ✔ Yes | ✖ No |
🎓 Looking for more AI tools?
Explore our curated list of the best AI tools for students that can help with studying, research, and productivity.
👉 Best AI Tools for Students🤖 NotebookLM vs ChatGPT: Which One Should You Use?
Both NotebookLM and ChatGPT are powerful AI tools, but they are designed for different purposes. NotebookLM excels at analyzing your own documents, while ChatGPT is better for brainstorming, writing, coding, and general AI assistance.
📱 Mobile Users: Swipe left or right to view the full comparison table.
| Feature | 📘 NotebookLM | 🤖 ChatGPT |
|---|---|---|
| Works with Your Documents | ✅ Excellent | ⚠️ Limited |
| Research Summaries | ✅ Excellent | ✅ Good |
| Document-Based Q&A | ✅ Excellent | ⚠️ Good |
| Content Writing | ✅ Good | ✅ Excellent |
| Brainstorming Ideas | ✅ Good | ✅ Excellent |
| Coding Assistance | ❌ No | ✅ Excellent |
| Web Research | ❌ No | ✅ Yes |
| Study Materials & PDFs | ✅ Excellent | ✅ Good |
📘 Choose NotebookLM if you work with PDFs, research papers, study materials, reports, and document-heavy workflows.
🤖 Choose ChatGPT if you need content creation, brainstorming, coding help, web research, and general AI assistance.
Pricing: Free + Premium Option
NotebookLM has a simple pricing model:
- ✅ Free Plan: Full access to core features
- 💼 NotebookLM Plus: Available with selected Google One plans for premium features
For most users, the free version is more than enough to get started.
Pros & Cons of Using NotebookLM
Let’s keep this how to use NotebookLM tutorial honest—here’s what’s great and what needs work.
✅ Pros:
- Works with your personal documents
- Reduces research time
- Clean interface
- Useful for students and bloggers
- Accurate document-based answers
- Free to start
❌ Cons:
- No real-time web search
- Limited integrations compared to some tools
- Requires organized documents
- Still evolving features
🚀 Real-World Use Cases of NotebookLM
🎓 Students
- Turn lecture notes into study guides
- Ask questions from academic material
- Summarize PDFs and textbooks
✍️ Bloggers & Content Creators
- Create content outlines
- Turn research into blog drafts
- Organize ideas and references
💼 Job Seekers & Professionals
- Summarize resume feedback
- Prepare interview answers
- Analyze company documents
Final Thoughts: Start Using NotebookLM Today
This how to use NotebookLM tutorial shows just how powerful this tool can be when used right. From note-taking and studying to drafting content and prepping for interviews, NotebookLM adapts to your needs.
If you’ve ever struggled to organize research, find specific information, or just get started with writing, give it a shot. You’ll be surprised how much easier your workflow becomes.
👉 Have you tried NotebookLM yet? What’s your favorite feature? Drop your thoughts in the comments below!
✅ External Links (Do-Follow):
FAQs: How to Use NotebookLM Tutorial – Common Questions
Q1: Can I use NotebookLM for free?
Yes, there’s a free version with all essential features included.
Q2: Can I use NotebookLM on mobile?
Yes. NotebookLM can be accessed on mobile devices, making it easy to review notes, summaries, and research on the go.
Q3: Is this better than ChatGPT for notes?
If you’re working with documents, NotebookLM is more focused. ChatGPT is broader, but doesn’t retain file context unless set up manually.
Q4: Is my content private?
Yes. Since sync is manual and local to your account, your documents remain secure unless shared.
Q5: Can NotebookLM help in content writing?
Yes, it can create outlines, summaries and FAQs from research material which helps content creators save time.
Q6: Can NotebookLM replace ChatGPT?
No. NotebookLM is best for document-based research and summaries, while ChatGPT is better for writing, brainstorming, and general AI tasks.
Q7: Can NotebookLM summarize YouTube videos?
Yes. NotebookLM can analyze supported YouTube content and generate summaries, notes, and key takeaways from the video transcript.
1 thought on “How to Use NotebookLM Tutorial the Easy Way (2026 Beginner’s Guide + New Features)”